Hello
Everyone,
This post was meant to come sooner as it talks about the settings of the light and shaders for our scenes. We thought in hindsight that we should make sure the shaders worked effectively in each scene before "popping the hood" as it were. Now that most of the scenes are lit quite nicely by our textures we figured it was time to sit down and hammer out this post for those that are curious.
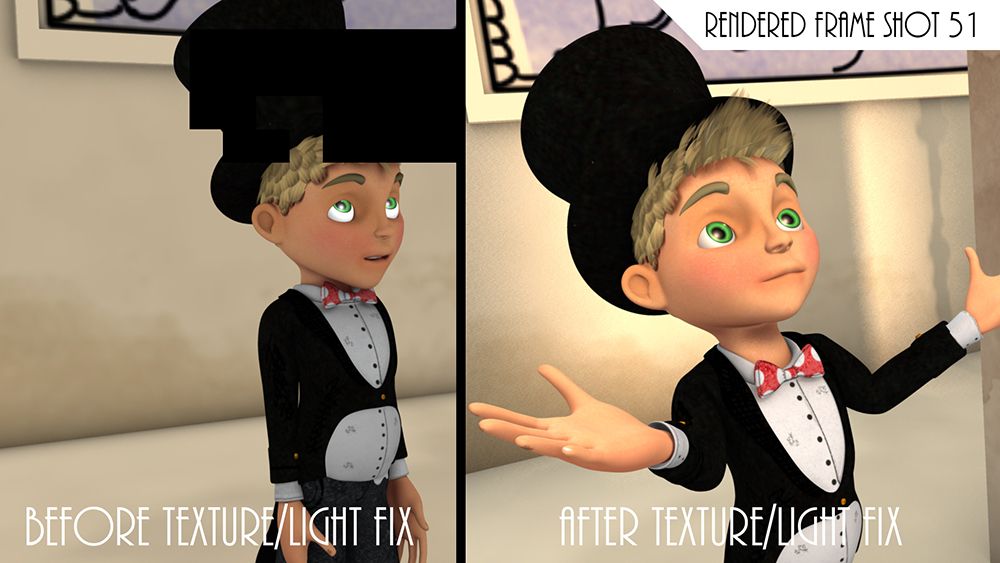
The image above shows a partial render of an unlit relatively flat Benjamin Badgersworth before fixes were applied to the shaders and the lighting in the scene. This is of Shot 51 where Benjamin denies that he is plotting a new prank. Light linking also played a role by allowing light to come through the windows of the interior church. This creates a kind of natural light.
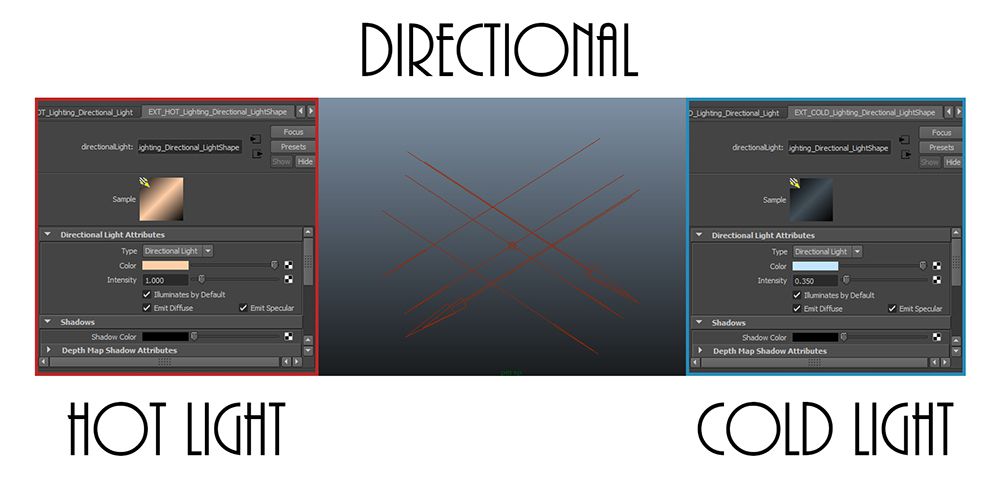
The image above shows the light settings for most of our scenes. We generally have 2 directional lights opposing each other the key light being orange (reflecting the sun). The softer of the two is to reflect the natural blue of the sky. For interiors there is also an ambient light to give the illusion of a illuminated glass pane. There are also instances were a spot light is implemented to bring additional shadow values to the characters. The key light is the only light to have ray traced shadow rays.
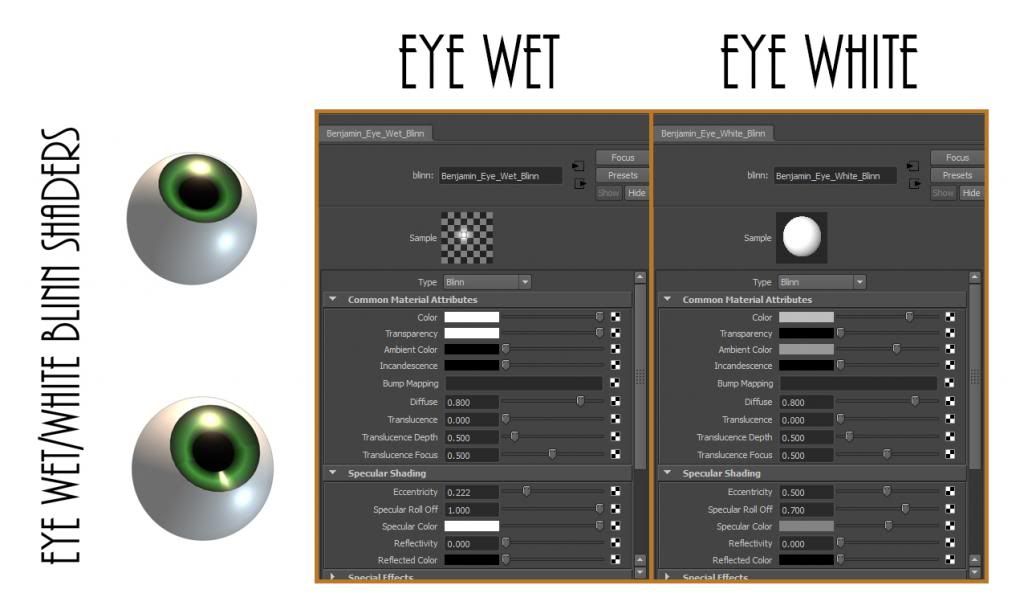
The image above is the adjustments made to the eye white and eye wet shaders to punch secularity of the eye wet (specular colour) and the ambient colour of the eye white while keeping a nice balance between the strength of the white eye colour. The iris and cornea are left at their default values, they key thing with the eyes is to make sure they stand out when light hits them.
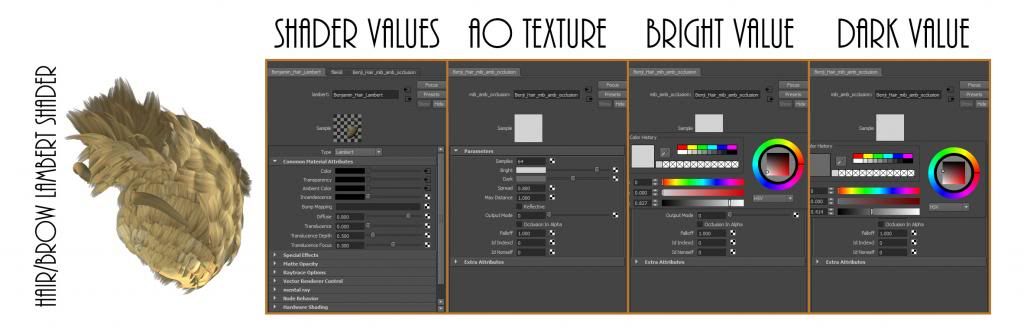
Next is the hair lambert shader which actually includes built in occlusion. The max distance of the AO texture is set to 1 to provide ample depth between the bright and dark settings which you can also see above. This creates a nice bit of range in between the cracks of the individual hair planes and really does allow you to appreciate the transparency of the planes.

From there we looked at the Body Lambert shader which has stronger max distance values to create more depth in the character crevices. The samples were also upped from the default value of 16 to 64 to create smoother depth. The bright and dark values were also altered slightly specifically the bright as it was lowered down to stop the texture from being too bright... This helped the shirt stand out.
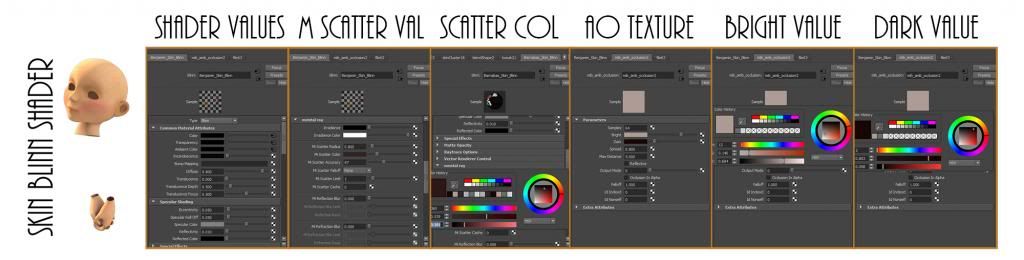
Last but not least comes the skin depth which was the main problem with our default settings. The occlusion was too dark and the M Scatter was set too high which caused it to bleach out the depth from the ambient occlusion texture. From bringing the scatter down we got darker depth from our occlusion dark value and by raising the bright and increasing the max distance to 5 it really made the skin reaction to light really pop. Well that's the settings we used for our characters.
Later!
xXStItChXx


No comments:
Post a Comment