It was that time again the other day when I sat down thinking jebus now the inevitable UV mapping spree that can scare the bravest of geeks. I sat poised at my computer wondering if I should just leave it to the girls to knock up but then a felt a lightning bolt hit me and before I knew it the model was unwrapped. Yes people Headdus is truly amazing and working in addition to a bit of Maya tweaking UV mapping can be a heavenly pursuit. I remember that this process used to be such a heavy chore but darting back between these apps I can create maps very quickly.
I had Barnabas's UV's done in about 2 hours it was just a complete breeze I had the programs working in perfect harmony. Every time I hit a twisty spot in Maya I would fire it over to Headdus and stretch the map and divide it further. I started getting the hang of the workflow after a short while and everything just quickly fell into place. The geometry of this model is mostly smooth. I am particularly happy with the layout of my Jacket. I never thought I'd get a model mapped so fast especially a character but I am pleased to say it is possible!
Anyway enough bragging lets check out the UVs for Adult Barnabas!
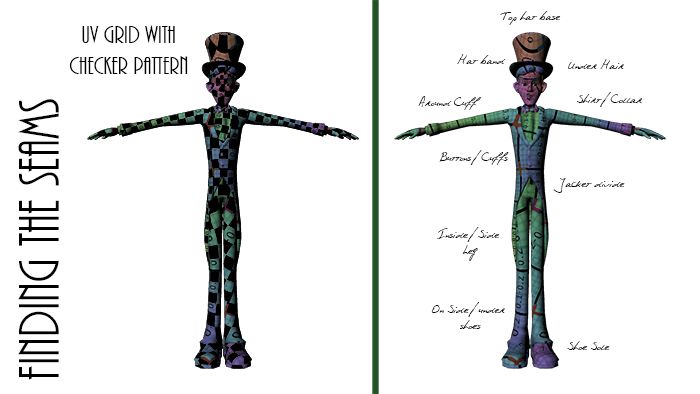
I have once again covered my bases by using the UV grid with a checker just to make sure nothing is overly stretched. I am not entirely happy with the Hat but then I think the hat is quite a circular object. Every time I would smooth the UVs of the hat things kept changing their minds. At one point the hat was happy the next moment it wasn't. In the end I got there though, I think it will do for this short. Everything else is neatly tucked away as the diagram above will show. I made a point to hide every seem in a hidden crevice or side tuck.
The Video above shows the ZUV tiles for the Adult Barnabas, in the case of this video I thought I would provide a little introduction into Bringing models into ZBrush from Maya. I used this to lead on to viewing your ZUV's in ZBrush. Its a very basic process and those that know how to do it will say "why bother" but I guess I thought it would be good for the newbies who have never used the program before. I also use this to showcase the Barnabas models ZUV's everything else is just a little extra so I can break away from the standard ZUV video template.
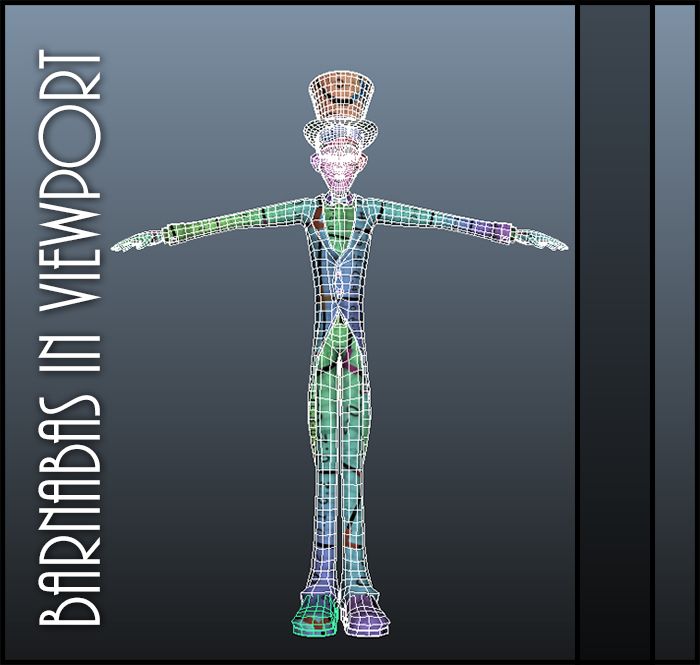
This is a view of Barnabas in the viewport from Maya with his UV grid tiles showing the separate geometry and seem placement. The spacing of the geometry is also quite nice in this model. Add that to the fact that all of the model geometry is low poly with the ability to be divided up, we are in a good place for low and high grade geometry. I strongly believe that models should be built low for the purposes of rigging and UV mapping it makes things easier. Once you have the constructs of your model its easy to divide up and add additional detail with a higher count.
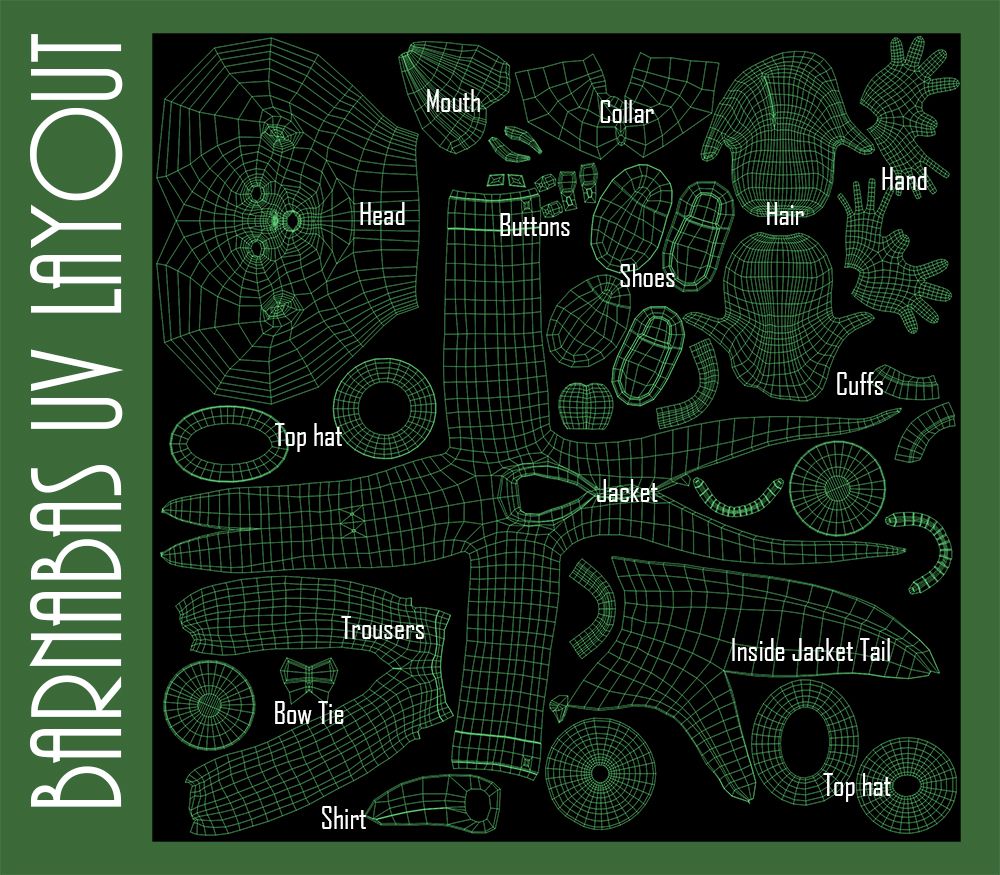
To conclude this little post I have provided the Barnabas UV layout with its relevant areas marked with a subtitle. Sometimes you have to separate geometry groups so everything fits within the grid. For example I wanted to keep the hat pieces together but it ended up becoming where you could fit a part to keep the texture quality as high as possible. I always look to retain most of the detail in the face of the character. The torso and trouser quality is next and then of course the shoes etc. Hair and hands are also good to factor in.
This post has made me confident for the Bernard model should he need any UV tweaks once I have converted Barnabas into his form. At least I will be in a better place when sitting down to knock out his UVs should the problem arise. Bernard will be coming at some point in the future, the goal at the moment is to be getting the main 2 characters ready which are Barnabas and Benjamin. These will be my priority over the next week or so. If you do not see many posts its because I am slaving away getting these ready for Sammy when I am away. Anyway I think that's a good note to close on...
Later people!
xXStItChXx


Hi chaps - see this blog; it's the one I refer to in your feedback - it's really worth scrutinising in terms of the way in which they go about blocking out the animation: you'll have to 'older post' to find the requisite workflow, but I'd like to see this level of unpacking of process on this blog - and with a minimum of 'over-writing'...
ReplyDeletehttp://atompancakesblog.blogspot.co.uk